Contents
- Atmosphere Parameters
- Cloud Parameters
- Sun Parameters
- Sampling Quality
- Ground Parameters
- Animation
- Color Correction
- Technical Parameters
- Clouds Stack
- Sky Addins
- Sun Effects
- Recommended Workflows
Rombo Sky is a sophisticated background volumetric rendering system designed to create physically-based atmospheric effects with a focus on realistic cloud formation and lighting. At its core, it uses ray marching techniques to simulate both single-scattering volumetric clouds and atmospheric phenomena like Rayleigh and Mie scattering.
The renderer's key strength lies in its physically-based approach to light transport and its highly modular architecture. For clouds, it employs a volumetric ray marching algorithm that accurately simulates how light interacts with cloud particles, creating effects like silver linings and realistic self-shadowing. What makes this system particularly powerful is its flexible architecture - the ray marching engine is designed as a generic volumetric renderer that can accept any custom noise function or shader plugged into the cloud stack. This means users can define their own volumetric density functions, creating anything from classic cumulus clouds to entirely custom atmospheric effects, all while benefiting from the physically-based light transport system.
The atmosphere is modeled using combined Rayleigh-Mie scattering, which accurately reproduces phenomena from the deep blue of a clear sky to the warm colors of sunset. The system also features a comprehensive volumetric fog system that not only creates depth in the scene but also interacts with clouds to cast volumetric shadows, producing effects like god rays when the sun is partially obscured.
What sets this renderer apart is its unified approach to atmospheric effects and its extensibility. The modular architecture allows for continuous expansion of atmospheric phenomena beyond the core feature set. Additional effects such as solar turbulence, auroras, stars, sun pillars, and other atmospheric phenomena can be seamlessly integrated into the rendering pipeline. Rather than treating clouds, sky, and fog as separate elements, it handles them as an integrated system where each component affects the others, while allowing users to not only plug in custom volumetric definitions but also add entirely new atmospheric effects.
This flexibility, combined with physically accurate light transport, means the system can render anything from realistic atmospheric conditions to completely imagined volumetric environments. This is particularly evident in how cloud shadows affect atmospheric scattering and how the time of day naturally influences all atmospheric elements. The system even supports both solar and lunar lighting modes, making it capable of rendering convincing scenes from bright daylight to moody night skies, with the ability to continuously expand its repertoire of atmospheric phenomena through its modular design.
Atmosphere Parameters

- Red (0.27): Sunrise/sunset colors
- Green (0.5): Midday sky tint
- Blue (1.0): Overall sky color
- Dawn/Dusk: Increase red component
- Midday: Standard values
- Overcast: Reduce all components equally
Atmospheric Scattering
- Low (0.01-0.1): Clear sky, sharp sun disk
- Medium (0.1-1.0): Natural haze, soft sun disk
- High (1.0-5.0): Heavy atmospheric scattering
- sunSize for apparent sun disk size
- fogBrightness for horizon appearance
- sunInscatter for overall atmospheric glow
Atmospheric Effects
- Affects distance visibility falloff
- Creates volumetric shadows from clouds
- Enhances sunrise/sunset effects
- With fogDensity: Controls god-ray intensity
- With skyMie: Affects overall atmospheric density
- With cloud shadows: Determines shadow projection
- God-ray intensity and spread
- Volumetric shadow strength
- Atmospheric scattering density
- Sky brightness
- Sky saturation
- Fog intensity
Atmospheric Controls
- Affects visible sky appearance
- Enhances volumetric clouds brightness
- Affects global illumination
- Affects reflections
Cloud Parameters

Basic Cloud Control
- When approaching 1.0, ensure cloudsDensity is appropriately low
- Works in conjunction with cloudsDensity - adjust layer first for broad control
- Affects overall scene exposure and light transmission
Cloud Structure
- 1000-2000: Low-lying stratus clouds
- 2000-6000: Typical cumulus clouds
- 6000-10000: High-altitude cirrus
- With fogDensity: Higher clouds show more pronounced atmospheric scattering
- With groundHline: Affects shadow projection and ground interaction
- With cloudsDensity: Height affects light penetration characteristics
- With cloudsDensity: Thicker clouds need lower density to maintain realism
- With fogDensity: Affects light penetration through cloud layers
- With sampling parameters: Higher thickness requires more samples
- With volumetric shadows: Thicker clouds cast more defined shadows
- With layer: Combined effect determines final cloud opacity
- With cloudsThickness: Thicker clouds need lower density
- With scattering parameters: Higher density emphasizes scattering effects
- With sunInscatter: Denser clouds create more pronounced silver linings
Cloud Scattering
- Realistic cumulus: forward ≈ 0.8, backward ≈ -0.5
- Wispy cirrus: forward ≈ 0.95, backward ≈ -0.2
- Stormy clouds: forward ≈ 0.7, backward ≈ -0.7
- sunRadiance for overall brightness
- sunInscatter for edge lighting
- cloudsDensity for scattering intensity
- Clouds brightness
- Fog intensity
Cloud Detail
- Stretched stratus: (2.0, 0.5, 2.0)
- Puffy cumulus: (1.0, 1.0, 1.0)
- Streaky cirrus: (3.0, 0.3, 1.0)
- Reducing Y (>0.86) increases rendering speed
- With cloudsXYZScale: Together determine cloud shape complexity
- With sampling parameters: Higher detail needs more samples
- With animation: Higher values may create more noticeable temporal noise
Sun Parameters
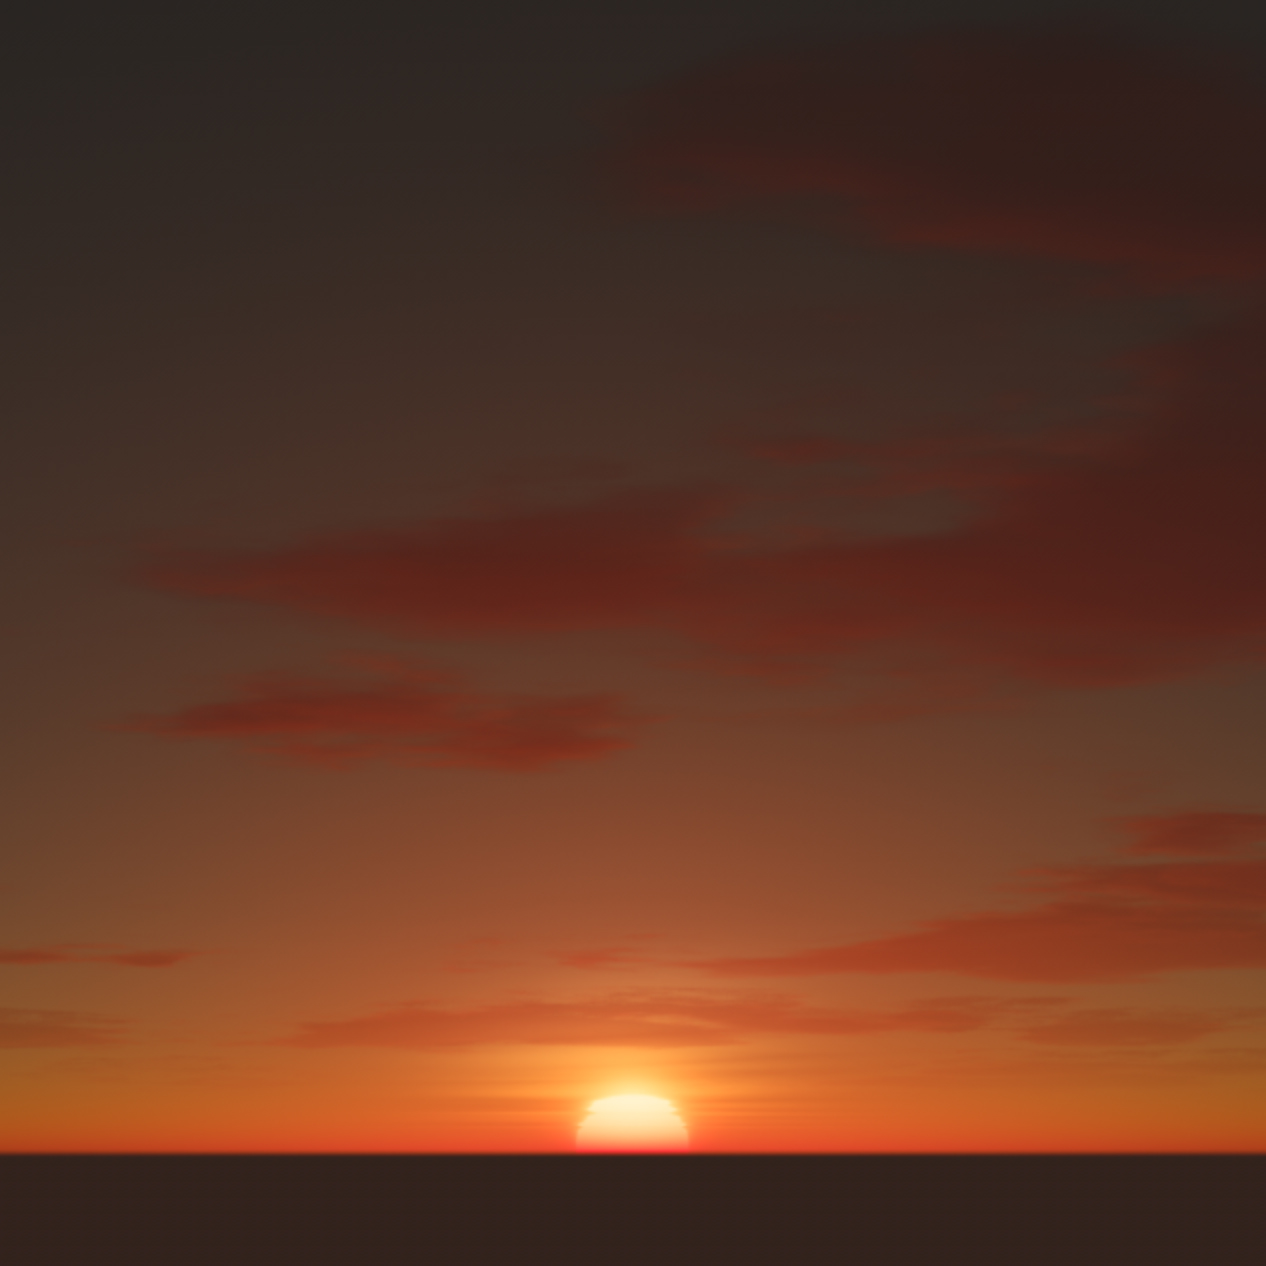
Solar Disk
- sunBrightness: Together determine core brightness
- sunLimbdarkening: Affects edge appearance
- skyMie: Influences apparent size through atmosphere
- 0.0: Uniform brightness
- 0.5: Natural solar appearance
- 1.0: Maximum edge darkening
- Use very little with sun LimbDarkening
- Keep sun brightness low with big bloom values to simulate eclipses
- Balance with sunLimbDarkening for natural look
- Add sun efx bloom for improved realism
- Higher spots need larger sizes for realism
- Balance with sunLimbDarkening for natural look
- Tone it down for fuzzier less contrasted shadows
- How sun appears in reflections
- How much sun light will influence diffuse (GI) reflections
Solar Effects
- Overall sky exposure
- Sun glow size and intensity
- Overall atmospheric brightness
- Scene indirect illumination
- Overall scene brightness
- Importance sampling environment
Sun Positioning
- Time of day lighting
- Shadow direction and length
- Atmospheric color through scattering
- Plug romboSkyPosSun node to position sun based on time
- Use romboSkyPosLatLong to arbitrary position sun
- At 0 1 0 sun is at zenith
- Scattering intensities
- Light source size
- Color temperature
- Plug romboSkyMoon into Sky Addin0 slot
- Position sun and moon with appropriate nodes
Sampling Quality
Ray Marching Settings
Ray marching is a rendering technique used to calculate light interactions as a ray travels through a medium, such as fog, smoke, or clouds. Unlike traditional ray tracing, which computes intersections with geometric surfaces, ray marching samples along the ray's path at regular intervals to evaluate how the medium affects light scattering, absorption, and transmission.
- With cloudsThickness: Thicker clouds need more samples
- With cloudsDensity: Denser clouds need more samples
- With cloudsFrequency: Detailed clouds need more samples
- Silver lining quality
- Shadow softness
- Cloud illumination detail
- Cloud shadow definition
- God-ray quality
- Ground shadow detail
- Fog quality
- Atmospheric scattering detail
- Volumetric shadow quality
- Copes great with Arnold global AA settings
- Converges as path tracing does
- Faster passes for more interactivity
Ground Parameters
- Horizon appearance
- groundHline for horizon definition
- Ground plane elevation
- Cloud height reference
Animation Parameters

- Cloud noise evolution
- Any time-based effect
- Affects cloud noise evolution
Color Correction
- Sun Inscatter for overall sky brightness
- Fog Brightness for atmospheric exposure
- Contrast for final look
- Highlight rolloff
- Shadow detail
- Overall contrast
- Filmic for tone mapping
- Exposure for overall look
- Vibrance for color impact
- skyRayleigh for atmospheric color
- sunRadiance for light color
- ccContrast for overall impact
- Shadow detail and fill
- Overall atmospheric ambient light
- Direct sun lighting
- Cloud shadow density
- Overall scene exposure
Technical Parameters

- 0.1-0.25: Fast preview quality
- 0.5-0.75: Production quality
- 0.75-1.0: Full quality
- Global illumination on scene
- Reflections on scene objects
- Overall flickering from GI
- 0: Silent operation
- 1: Basic information
- 2: Detailed information
- 3: Debug information
- 4: Full diagnostic output
- Performance optimization
- Error tracking
- Parameter validation
Cloud Stack
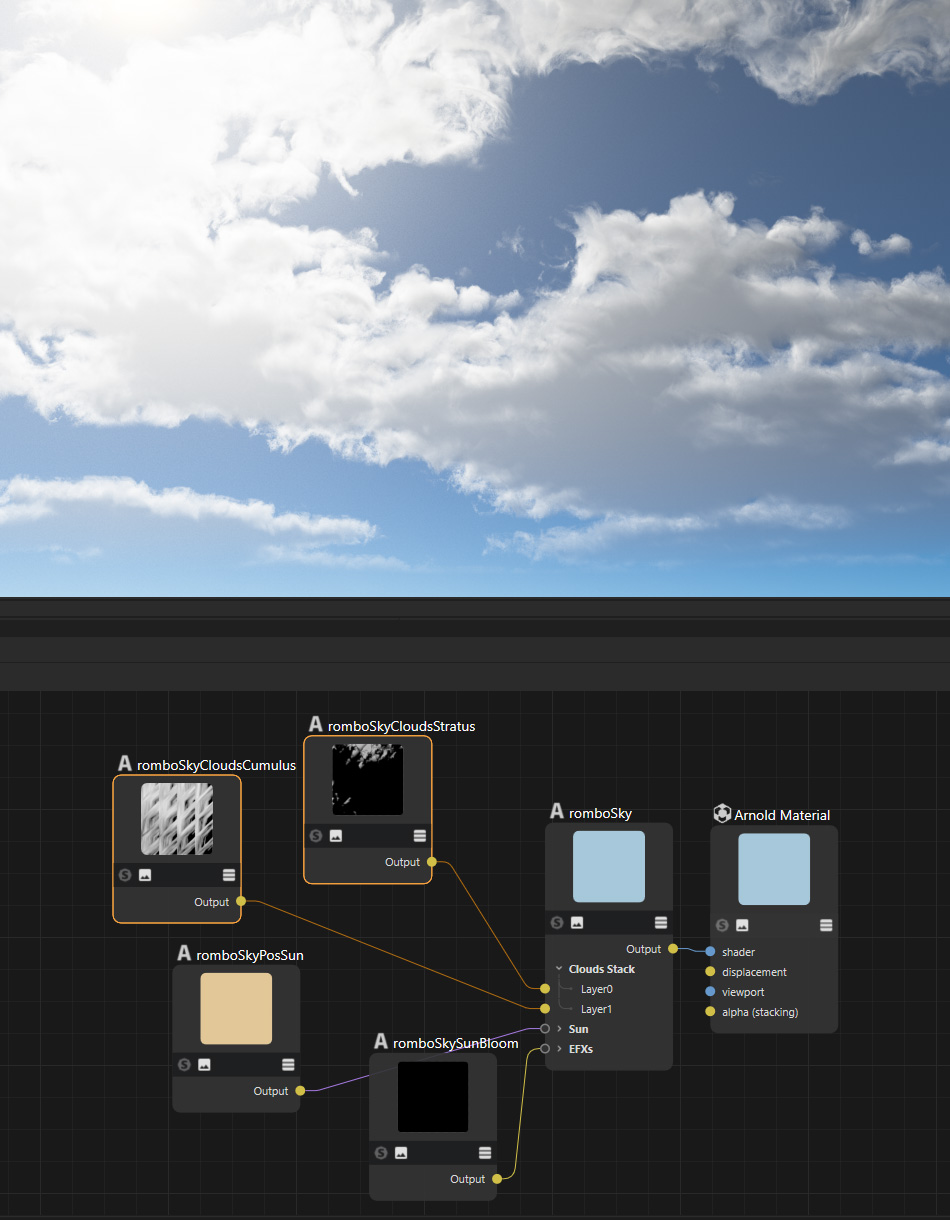
Rombo Sky renderer implements a unique Cloud Stack system that allows for seamless integration of external cloud shaders through a standardized interface. This modular approach enables users to extend the renderer's capabilities beyond its built-in volumetric system.
Interface Design
The Cloud Stack interface consists of three float sockets that serve as the primary connection point between rombosky and external cloud shaders:
- Density Output: Returns the computed density value at the current sampling position
Integration Mechanism
External cloud shaders can be attached to these sockets to activate the cloud generation system. The ray marching engine will evaluate these shaders at each sampling point during the volumetric rendering process, allowing for:
- Custom noise functions and procedural patterns
- Dynamic cloud shape modifications
- Complex layering and blending of multiple cloud types
- Integration of weather data or external simulation results
- Real-time modification of cloud characteristics
Extensibility Benefits
This modular architecture provides several key advantages:
- Customization: Users can implement their own clouds while leveraging renderer's physical light transport
- Compatibility: External tools and shaders can be easily integrated into the rendering pipeline
- Flexibility: Multiple cloud layers can be combined and modified independently
- Performance: Custom optimizations can be implemented for specific use cases
Usage Example
A typical cloud shader integration might involve:
- Create/instace a custom cloud shader
- Connect Density Output to Cloud Stack slot
- Tweak clouds params to see changes in IPR
- Configure sampling parameters for optimal results
Advanced Features
The Cloud Stack system supports advanced features such as:
- Multi-layer cloud combinations
- Dynamic weather pattern integration
- Procedural noise function chaining
- Real-time parameter modification
- Custom optimization strategies
Note: While the Cloud Stack provides extensive flexibility, it's important to consider performance implications when designing complex shader chains. The ray marching engine will evaluate all connected shaders at each sample point during rendering.
Sky Addins
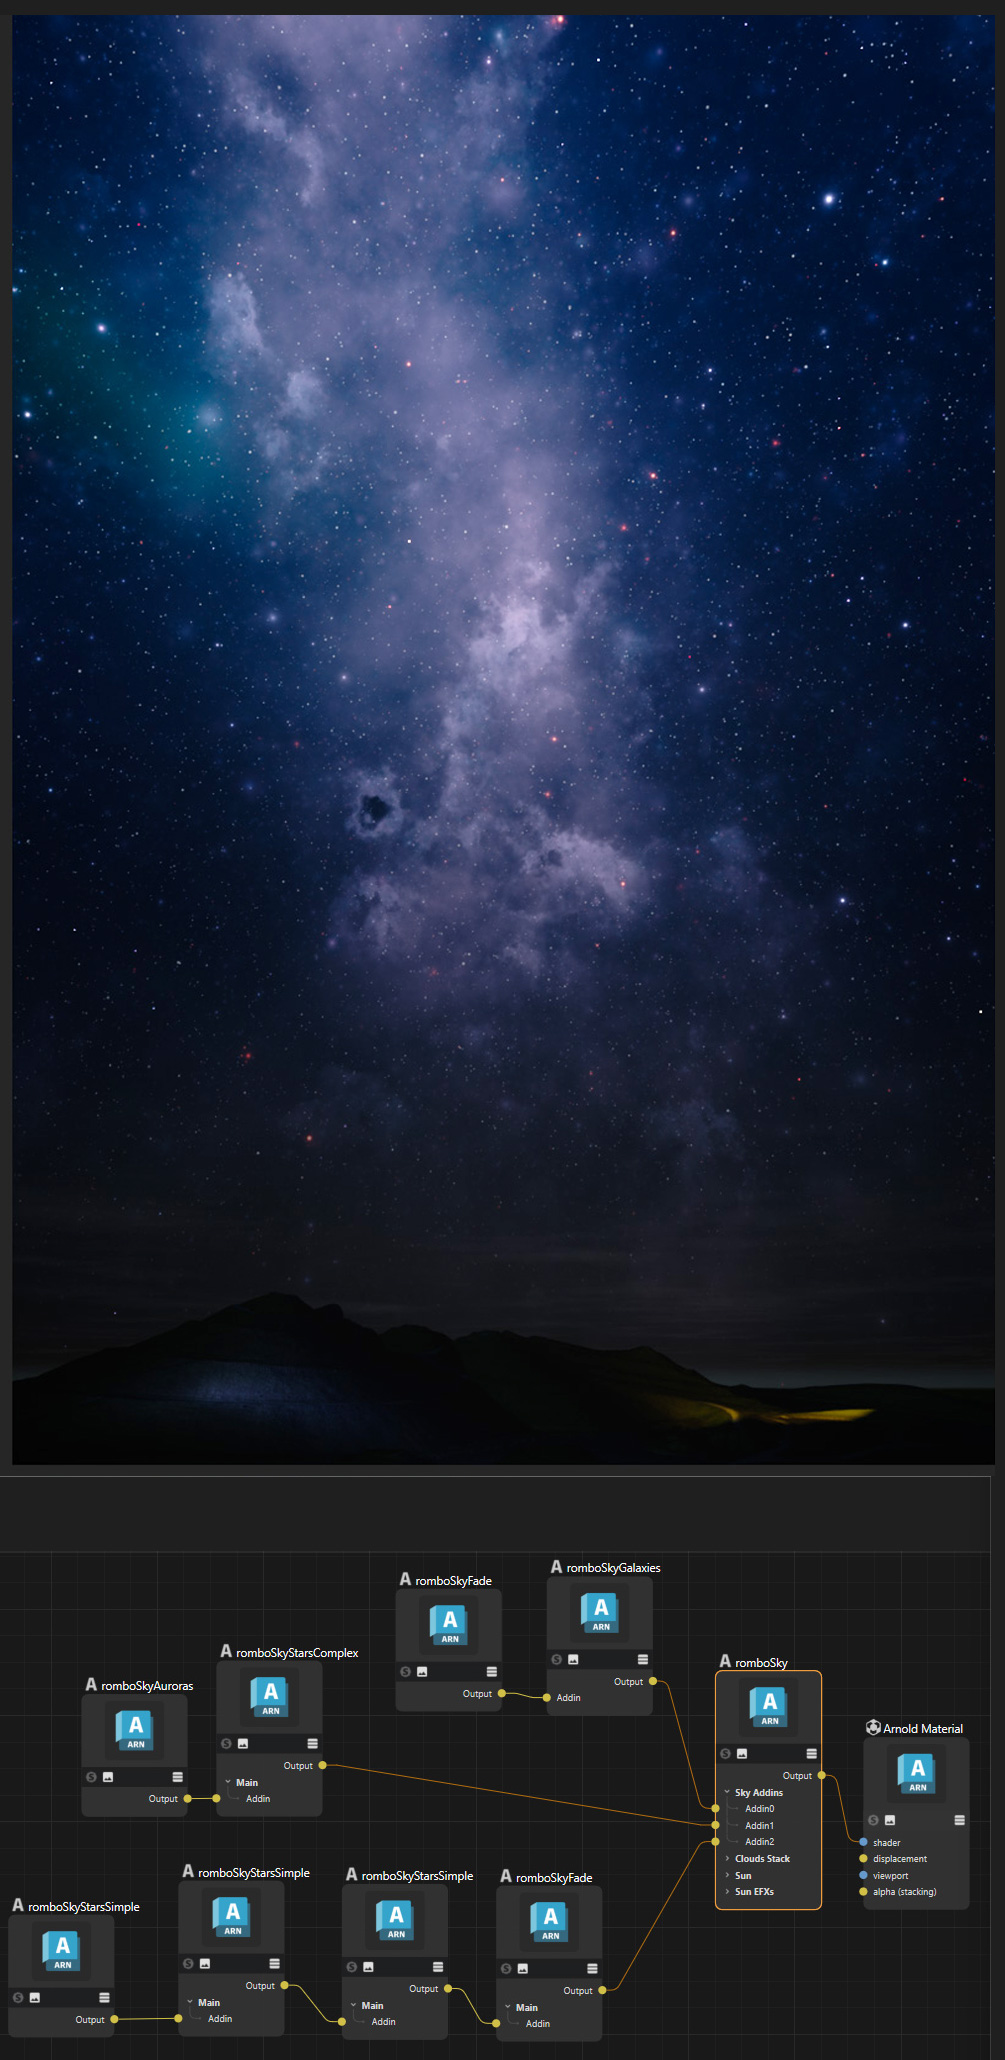
The Rombo Sky Renderer features a flexible Sky Addins system that allows for the integration of additional atmospheric phenomena and celestial objects through three RGB sockets. This modular approach enables users to enhance the sky with various effects while maintaining proper integration with the main atmospheric rendering.
Interface Structure
The system provides three RGB slots for attaching additional sky elements:
- Slot 0: Primary slot, with special handling for Moon rendering in Night Time mode
- Slot 1: General-purpose atmospheric phenomena
- Slot 2: General-purpose atmospheric phenomena
Slot 0 and Moon Integration
While Slot 0 can be used for any sky addition, it has special significance when Night Time is enabled in the Rombo Sky renderer:
- When isNight parameter is true, Slot 0 is expected to receive input from the Moon node
- The Moon rendering integrates with the atmospheric scattering system
- When not in Night Time mode, Slot 0 functions as a standard addition slot
Available Phenomena
Current implemented phenomena that can be attached to any slot include:
- Stars:
- Simple star field generation
- Complex star systems with proper motion and twinkling
- Aurora:
- Realistic northern lights
- Customizable colors
- Galaxies:
- Realistic galaxy rendering
- Customizable size and brightness
- Quasars:
- Distant bright objects
- Atmospheric interaction effects
Integration Capabilities
Each Sky Addin can interact with the main renderer's systems:
- Proper atmospheric scattering integration
- Respect for time-of-day lighting conditions
- Support for animation and dynamic effects
Usage Guidelines
Best Practices:
- Reserve Slot 0 for Moon when using Night Time mode
- Layer phenomena from back to front across slots
- Consider atmospheric density when combining effects
- Balance brightness levels between additions
Chaining Addins
Scenario:
- When an Addin depends on another one
- For example we don't want Stars to appear where the Moon is in shadow
- Connect Stars node to the Addin slot in the Moon node
- Instead to connect it directly to the Addins romboSky ports
Extensibility
The Sky Addins system is designed for continuous expansion:
- New phenomena can be developed and integrated
- Custom effects can be created through shader development
- Multiple effects can be combined when shaders have an Addin slot
- External data can be incorporated for dynamic effects
Performance Note: While the system allows for multiple simultaneous additions, consider the cumulative performance impact when combining complex effects. Each addition contributes to the overall render time.
Sun Effects
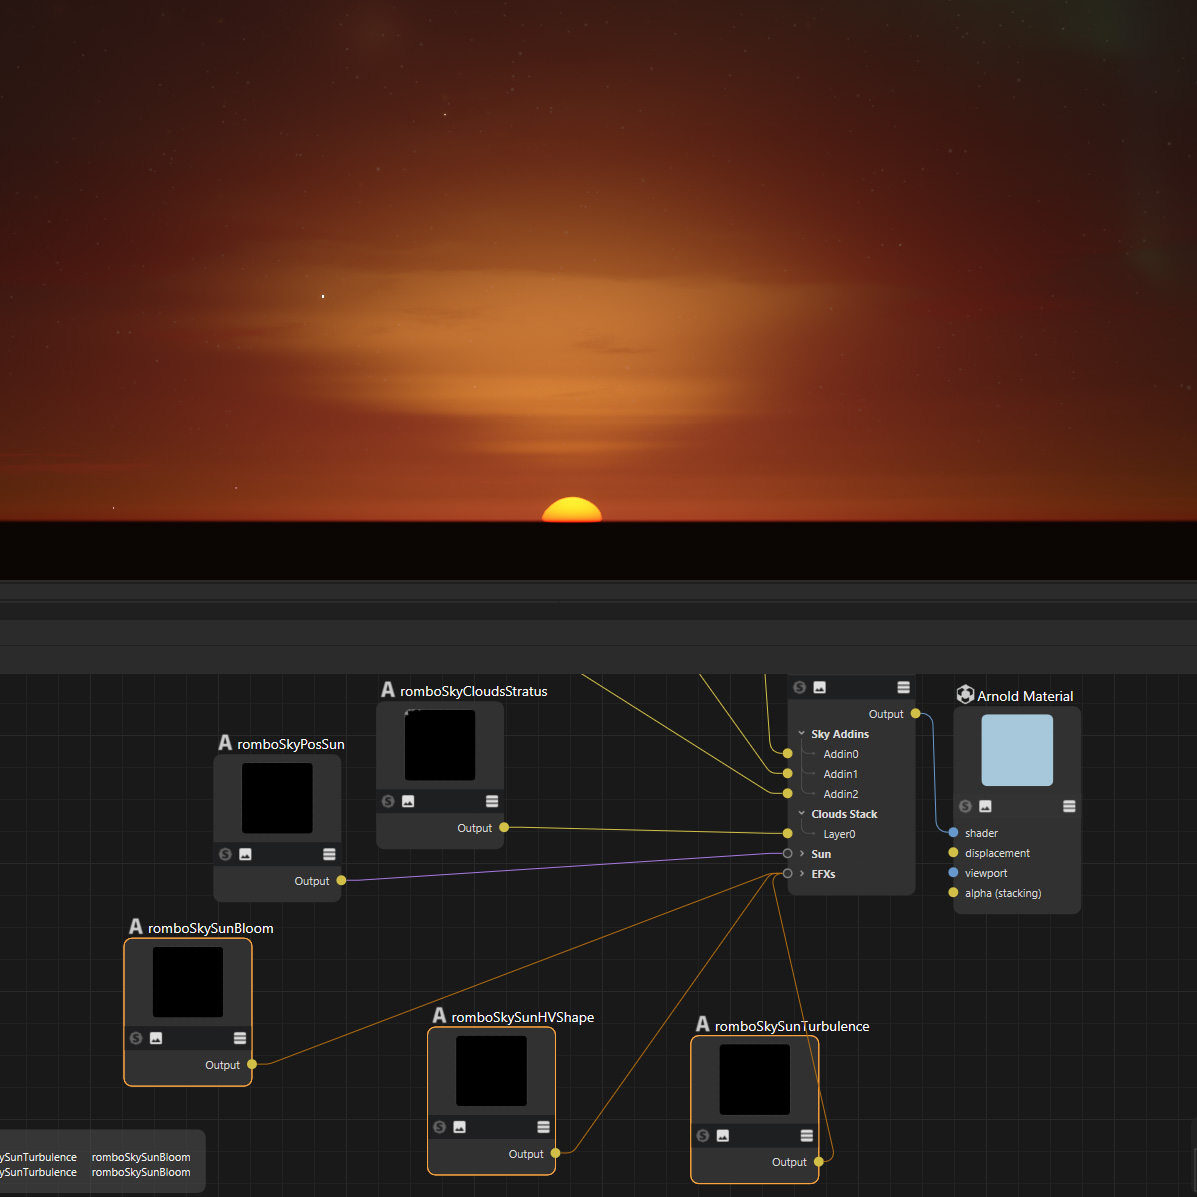
The Rombo Sky Renderer includes a sophisticated Sun Effects system that provides direct manipulation and enhancement of solar rendering through three RGB sockets. This system allows for realistic simulation of various solar phenomena and atmospheric effects that interact directly with the sun's appearance and behavior.
Available Sun Effects
Sun Turbulence
- Simulates real-world atmospheric distortion of the sun's shape
- Essential for realistic sunset rendering
- Dynamically deforms the sun disk based on atmospheric conditions
- Particularly effective when combined with low sun angles
Sun Bloom
- Creates realistic glow and bloom effects around the sun disk
- Adjustable intensity and spread
- Simulates atmospheric light scattering
- Essential for achieving photorealistic sun appearance
Sun Pillars
- Renders vertical light columns extending from the sun
- Simulates ice crystal light reflection/refraction
- Common in cold weather conditions
- Adjustable height and intensity
Sun Horizon V-Shape
- Creates characteristic V-shaped distortion at horizon
- Simulates complex atmospheric refraction
- Particularly visible during sunrise/sunset
- Physically accurate horizon interaction
Integration System
The Sun Effects system provides three RGB sockets for effect combination:
- Socket 1: Primary sun effect (commonly used for turbulence or bloom)
- Socket 2: Secondary effects
- Socket 3: Tertiary effects
These sockets allow for:
- Direct manipulation of the sun's rendered shape
- Complex layering of multiple effects
- Dynamic response to atmospheric conditions
- Real-time effect modification
Common Usage Patterns
Realistic Sunset Configuration:
- Socket 1: Sun Turbulence with moderate intensity
- Socket 2: Sun Bloom with warm color temperature
- Socket 3: Subtle horizon V-shape effect
Cold Weather Atmosphere:
- Socket 1: Reduced sun bloom
- Socket 2: Prominent sun pillars
- Socket 3: Subtle turbulence for atmospheric movement
Technical Integration
Each sun effect can interact with:
- Main atmospheric scattering system
- Time-of-day lighting calculations
- Cloud layer interactions
- Atmospheric density variations
Performance Considerations:
- Effects are evaluated in order of socket assignment
- Complex effects (like turbulence) may have higher computational cost
- Multiple active effects may impact render time
- Effects automatically scale detail based on sun disk size in frame
Advanced Features
- Real-time parameter adjustment for all effects
- Physically-based interaction with atmosphere
- Time-based evolution of effects
- Support for custom effect development
- Automatic adaptation to scene scale and camera position
Note: When combining multiple sun effects, consider their natural interaction and avoid over-accumulation of effects that might lead to unrealistic results. The system is designed to maintain physical plausibility while allowing for artistic control.
Workflows
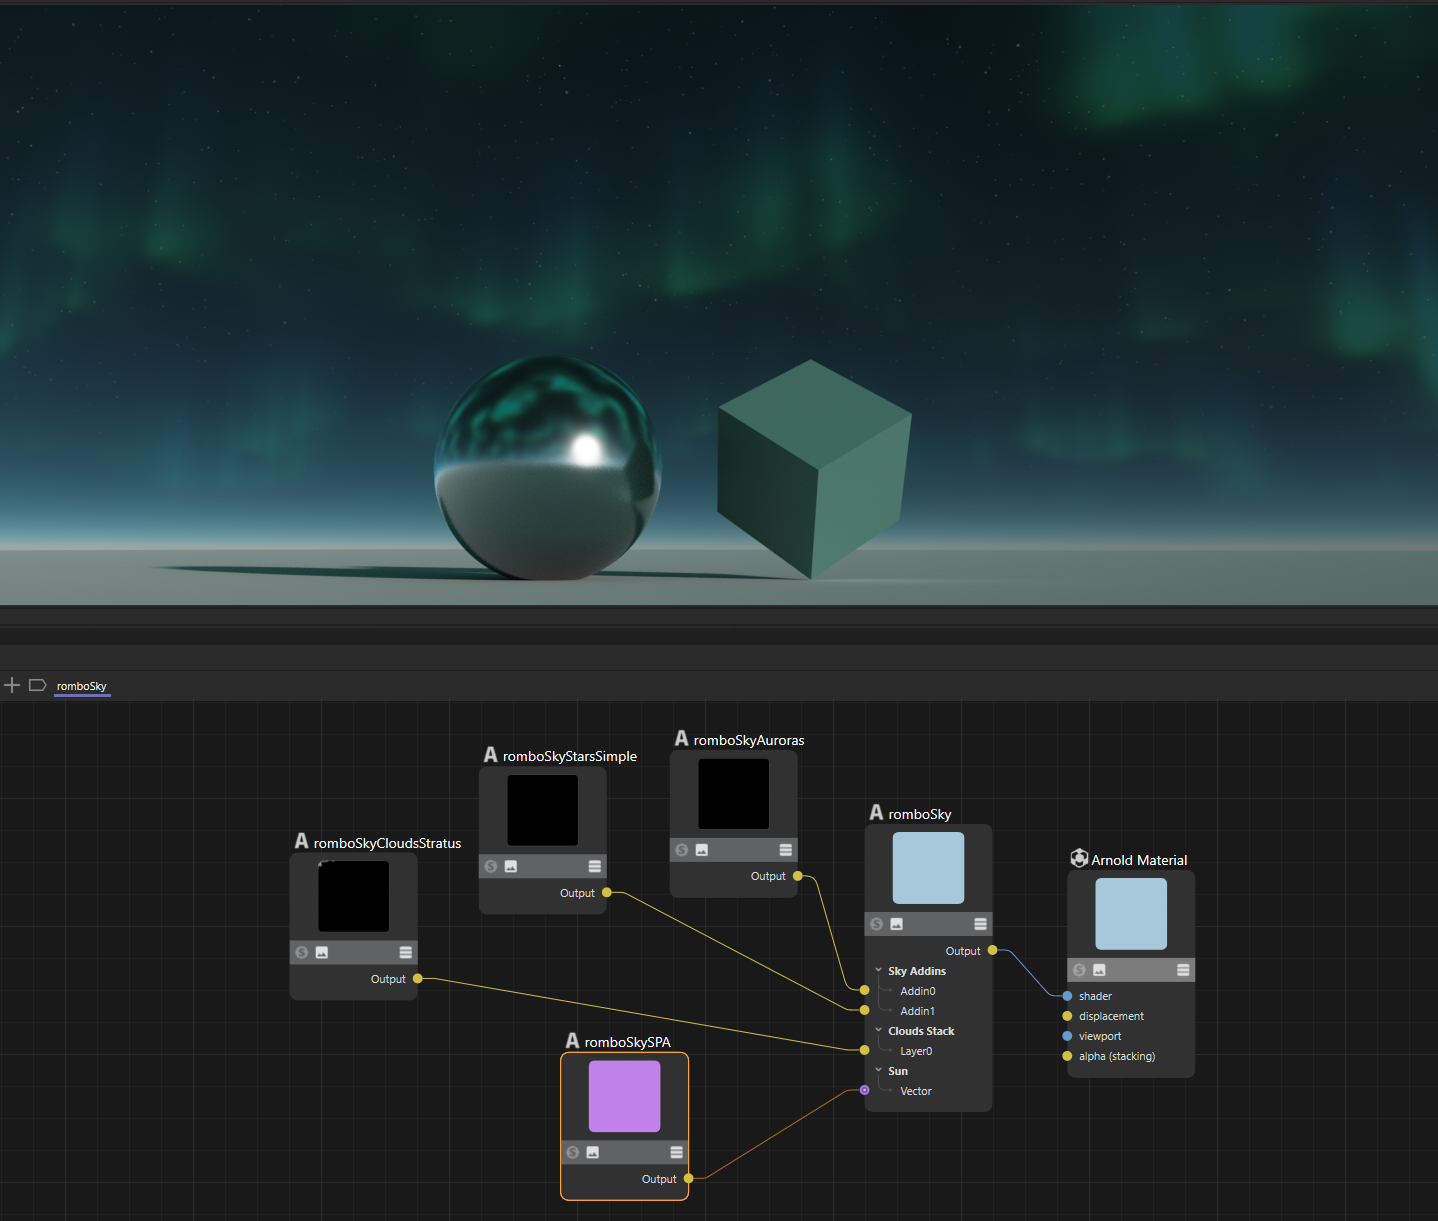
1. Basic Setup
- Set Sun Vector for time of day
- Adjust for desired lighting angle
- Consider NightTime for night scenes
- Adjust cloudsHeight and cloudsThickness
- Set base height for cloud type
- Adjust thickness for desired volume
- Set basic layer and cloudsDensity
- Start with layer at 1.0
- Fine-tune cloudsDensity for detail
- Tune sunInscatter and fogBrightness
- Balance overall exposure
- Adjust atmospheric density
2. Cloud Detail
- Fine-tune cloudsFrequency and cloudsXyzScale
- Set detail level with cloudsFrequency
- Adjust shape with cloudsXyzScale
- Adjust cloudsPforward/Pbackward
- Set forward scatter for silver linings
- Adjust backward scatter for core darkness
- Set appropriate sampling parameters
- Increase samplerClouds for quality
- Adjust samplerLight for scattering
- Fine-tune samplerShadows for shadows
- Fine-tune cloudsDensity
- Balance with layer setting
- Adjust for final look
3. Atmosphere
- Balance skyMie and skyRayleigh
- Set base atmospheric look
- Adjust for time of day
- Adjust fogBrightness and fogDensity
- Set atmospheric density
- Fine-tune volumetric effects
- Fine-tune sunInscatter
- Adjust sun glow
- Balance with other atmospheric effects
- Set ground parameters
- Adjust groundColor for base tone
- Set groundBlur for horizon
- Fine-tune groundHline for placement
4. Final Look
- Balance scene global illumination and shadows
- Tweak Sun Radiance to control indirect illumination
- Sun brightness to control Arnold shadows crispness
- Adjust color correction parameters
- Set Exposure for overall brightness
- Adjust Contrast for punch
- Fine-tune Filmic for tone mapping
- Set Vibrance for color intensity
- Balance Ambient for fill light
- Fine-tune sampling quality
- Increase samplers for final quality
- Enable samplerStochastic if needed
- Adjust ISQuality for GI and reflections quality
- Set animation parameters if needed
- Configure animTime for timeline
- Adjust animSpeed for motion
- Verify with different Sun Vector values
- Check multiple times of day
- Verify night mode if used
- Final balance of all parameters
- Use Rombo Tonemapper to tonemap your scene
- Sun and atmosphere may need specific tonemappers
- Not all will preserve Sun intensity correctly
- Evaluate smoothness of sky gradients
